Using MongoDB to store data
This section deals with the modification of a service that we developed earlier. We will try to make it more reliable by replacing all local files storages with the real database (MongoDB).
Brief introduction into MongoDB
MongoDB is a NoSQL database that is very similar in structure to a JSON file (but could be much bigger and much more efficient). If you would like to get more information about MongoDB, follow these resources (it will help you understand what kind of database it is and how it differs from the others):
MongoDB is a well-known database. So you can find quite a lot of information about it in the Internet. For now, the main point is to understand how the data is stored in such a database.
MongoDB consists of collections. And collections consist of documents. We can think of the document as a Python dictionary with a flexible structure. For more detailed information follow article "What is a Document Database?". So, if the data can be represented as a dictionary, then MongoDB would be a good solution for the first step in creating a data warehouse in a more production way.
MongoDB Atlas
There are such services, which are called Database-as-a-Service (DBaaS). So we can use a real non-local database, which will launch on a server or in the cloud. In the example below we will use MongoDB Atlas. Thus, first steps for us in current tutorial will be:
- Create an account in MongoDB Atlas platform
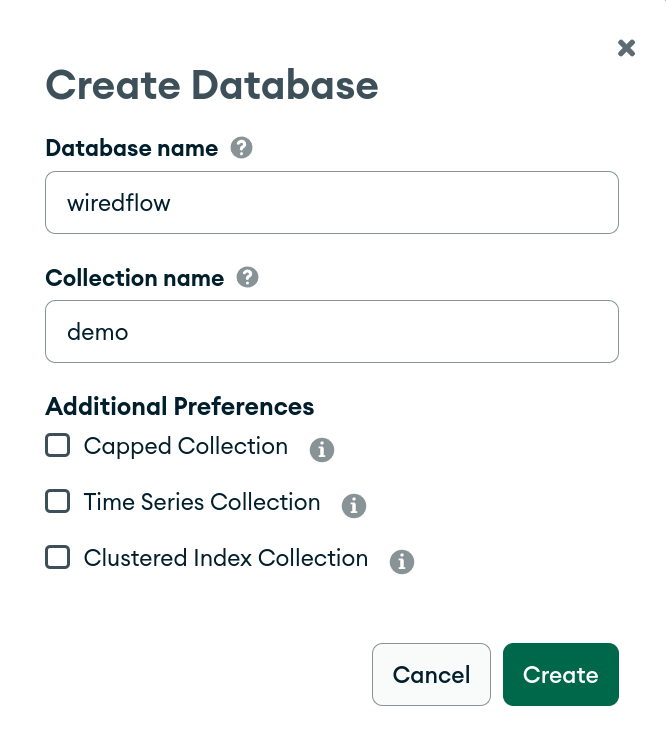
- Initialize cluster and create a "wiredflow" database
- Obtain credentials for connection
All the steps are described in detail in the official guide on the website - MongoDB Atlas Tutorial. Please follow the instructions and at the end you should receive the credentials to connect to this database (check section "Generating a Database Connection String").
Insert the following names (current cluster name ClusterDreamlone):
Connection string will look something like this (your user name (dreamlone), password (mydreamlonepassword) and
cluster name (clusterdreamlone) will be different):
mongodb+srv://dreamlone:mydreamlonepassword@clusterdreamlone.ryubwzt.mongodb.net/?retryWrites=true&w=majority
Important! In this example, we will use only those resources that are provided by the service for free. This information is up to date on May 1, 2023. It may change in the future. Please follow the service policy.
Usage examples
So, the database and the collection are initialized. We have the necessary credentials to connect to the storage. We are completely ready to build our first ETL service, which will use a real database. Let's try it!
We modify the simple ETL service from the previous examples, which save data in a JSON file, see "Single thread service with HTTP connector" section. Thus, we will save randomly generated numbers obtained via the HTTP protocol into the database:
from wiredflow.main.build import FlowBuilder
from wiredflow.mocks.demo_bindings_threads import launch_demo_with_int_http_connector


def launch_flow_with_mongo_storage():
    """
    Example of usage MongoDB as storage in the pipeline. Single pipeline service is used for demonstration
    """
    flow_builder = FlowBuilder()
    flow_builder.add_pipeline('http_integers', timedelta_seconds=2)\
        .with_http_connector(source='http://localhost:8027',
                             headers={'accept': 'application/json',
                                      'apikey': 'custom_key_1234'})\
        .with_storage('mongo', source='mongodb+srv://clusterdreamlone.ryubwzt.mongodb.net/?retryWrites=true&w=majority',
                      database_name='wiredflow', collection_name='demo',
                      username='dreamlone', password='mydreamlonepassword')
    flow = flow_builder.build()
    launch_demo_with_int_http_connector(flow, execution_seconds=10)


if __name__ == '__main__':
    launch_flow_with_mongo_storage()
The MongoDB repository is configured using the with_storage(configuration='mongo') method.
Possible parameters that can be used for connection:
source- connection string (may contain credentials);database_name- name of database to connect;collection_name- collection name to connect;username- username credential;password- password credential.
Terminal output:
2023-04-25 14:07:59.049 | INFO     | wiredflow.mocks.http_server:_start_mock_http_server:150 - Start mock HTTP server in separate process: 127.0.0.1, port 8027. Execution timeout, seconds: 10
2023-04-25 14:07:59.057 | INFO     | wiredflow.main.flow:launch_flow:65 - Launch service with 1 pipelines using thread mode
2023-04-25 14:07:59.057 | INFO     | wiredflow.main.pipeline:run:155 - Launch pipeline "http_integers". Execution timeout, seconds: 10
2023-04-25 14:07:59.317 | DEBUG    | wiredflow.main.store_engines.mongo_engine.mongo_db:save:75 - MongoDB info. Successfully save data into database "wiredflow" collection "demo"
2023-04-25 14:08:01.343 | DEBUG    | wiredflow.main.store_engines.mongo_engine.mongo_db:save:75 - MongoDB info. Successfully save data into database "wiredflow" collection "demo"
2023-04-25 14:08:03.368 | DEBUG    | wiredflow.main.store_engines.mongo_engine.mongo_db:save:75 - MongoDB info. Successfully save data into database "wiredflow" collection "demo"
2023-04-25 14:08:05.391 | DEBUG    | wiredflow.main.store_engines.mongo_engine.mongo_db:save:75 - MongoDB info. Successfully save data into database "wiredflow" collection "demo"
2023-04-25 14:08:07.415 | DEBUG    | wiredflow.main.store_engines.mongo_engine.mongo_db:save:75 - MongoDB info. Successfully save data into database "wiredflow" collection "demo"
2023-04-25 14:08:08.415 | INFO     | wiredflow.wiredtimer.timer:will_limit_be_reached:44 - WiredTimer info: timeout was reached
2023-04-25 14:08:08.415 | INFO     | wiredflow.main.flow:launch_flow:79 - Flow finish execution
2023-04-25 14:08:17.403 | INFO     | wiredflow.mocks.http_server:_start_mock_http_server:165 - WiredTimer info: timeout was reached
Now is a good time to check if the data was saved correctly:
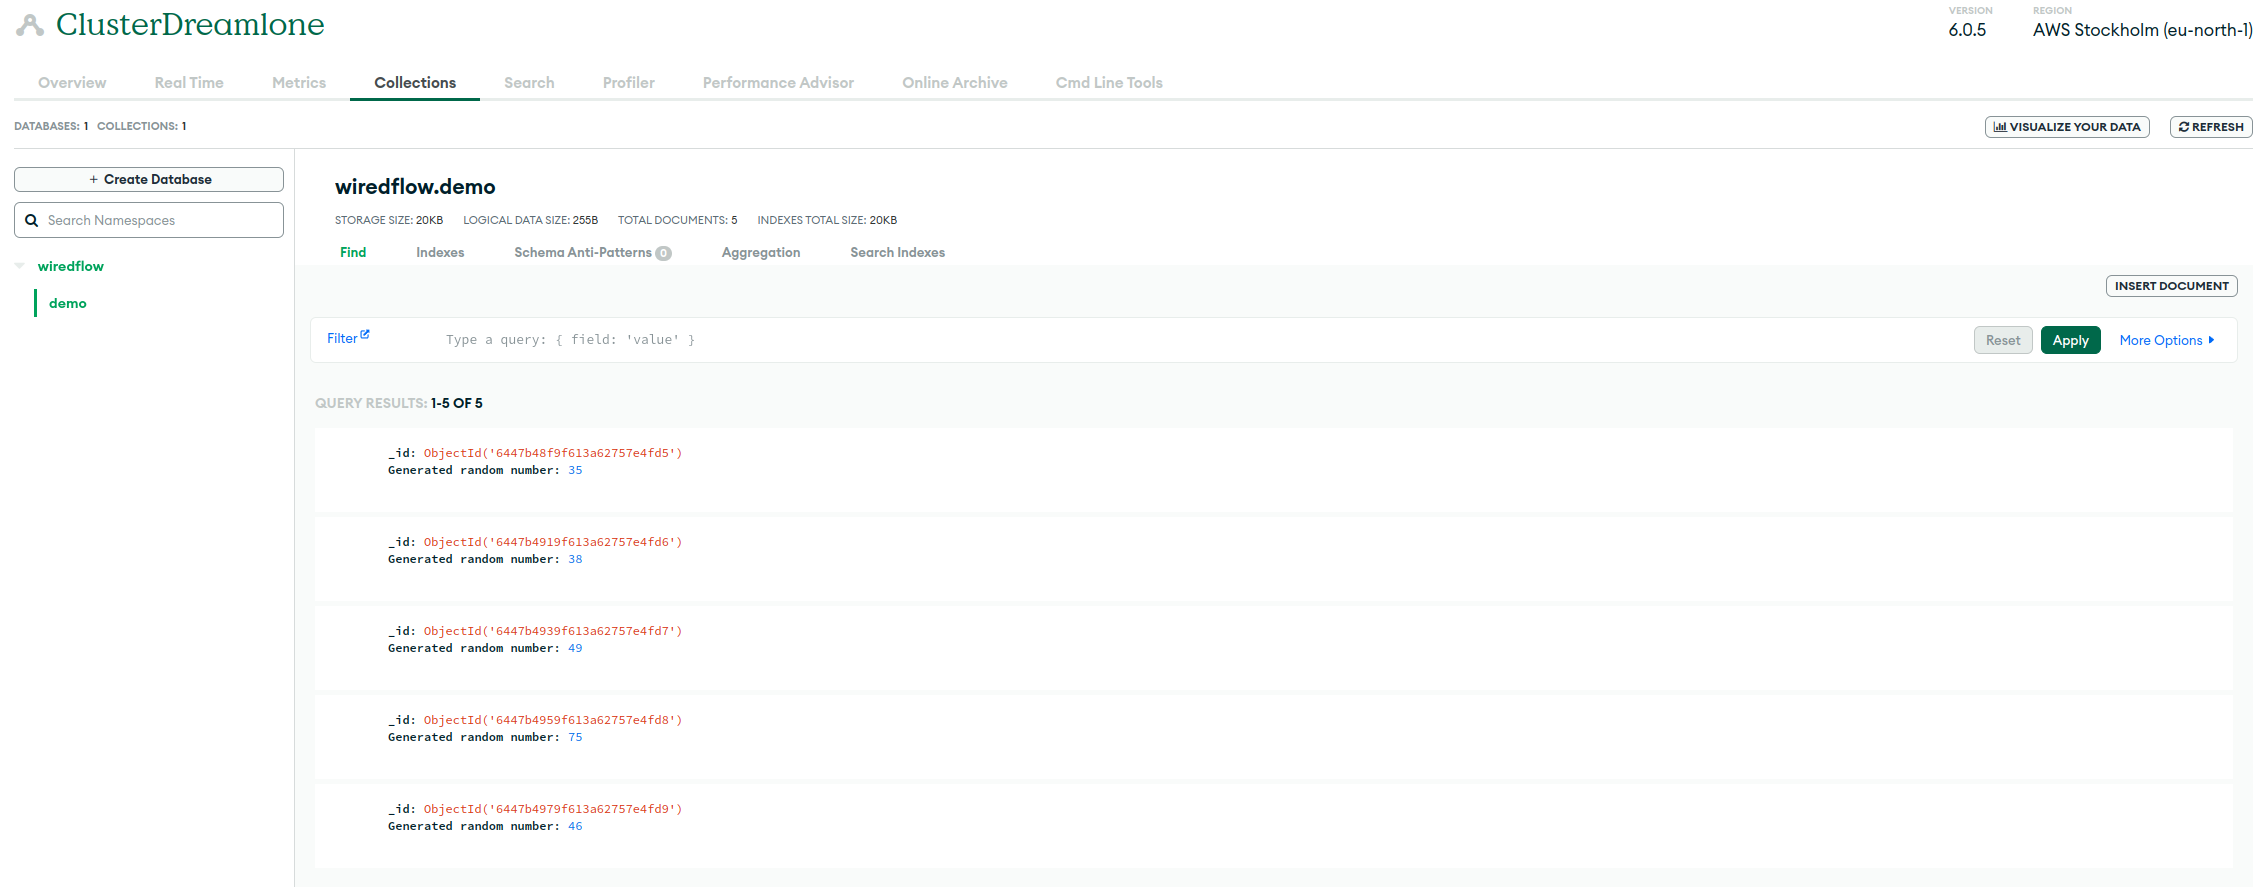
As can be seen from the screenshot above, we actually saved all the data into the right collection. Congratulations, you have now learned how to connect to MongoDB using wiredflow and use MongoDB storage in ETL process. Move on!